Tuesday, January 7, 2014

Frozen


Although skeptical at first about the film, Frozen, I discovered Disney had done it again! The new animated movie is at the top of my list of Disney favorites. It didn't seem as if Disney did a huge marketing campaign on this film but I guess they didn't really need to. During the Thanksgiving holidays, my daughter and I went to see it in theaters. Thinking to myself that it was impossible to top Tangled, I was proven wrong. Frozen was full of humor, song and delight. Buying the soundtrack is a MUST! If you need a taste of the music, here is something flavorful !

Though we all pick our favorite character, mine was the snowman, Olaf. He was just cute and innocent; full of love, too. While browsing around for some Frozen activities, I came across this Olaf printable over at Lady and the Blog. Check it out! If you haven't seen the movie, what are you waiting on?

Monday, November 18, 2013

I actually make what I pin on Pinterest!!

I see so many people pin things day after day and often wonder if anyone actually does the things they pin! If it is a project I really love...I DO! Now, I have had my fair share of "flops" but for the most part my Pinterest steals turn out great! So don't get discouraged...get out those craft supplies and make something! You may just surprise yourself!  Here is one I finished last night! It was very simple and cheap...doesn't get any better than that!
Here is the original pin...Horse Shoe Sign.

Here is a wooden door sign made for the fall....
And...the original Pin...Chevron Pumpkin Door Hanger

I even got my daughter in on the action!


Once more, the original Pin...Hand Tree.

None of this is exactly "Ahhh"-mazing but it proves Pinterest CAN be more than a browsing site. I do plenty of original things that I pin as well! Hopefully you will find some Pinsperation and make something wonderful!

Friday, November 15, 2013

Home Remodel

Let me give you a little background information. We bought our starter home in 2007. I was fresh out of nursing school and we didn't want a new house with an enormous mortgage. Looking for a house is not easy but having a good realtor makes a huge difference. After a few months searching, we finally found something that caught our eye. It was an estate; 3 bedroom, 2 bath, brick, ranch in style with an acre of land. We saw it as an investment. It was a roomy house with a nice front and back yard in a nice area. It was a fair price and affordable...which is important when you buy your first house. The only problem was it was built in 1979 and no one had touched it since. Luckily my husband is handy and does a really good job when it comes to remodeling.The pictures below will help you put an image with the makings of the house.  The most drastic change in the entire house was the flooring (it still had brown shag carpet..sigh)!  It was all outdated. We started with our daughter's room, then the living room, progressed to the hallway. We took a break to save some more money and then started the kitchen. In the mix, we did our daughter's room again to make it a "big girl" room.  Presently, we are finishing the laundry room. That leaves 2 bedrooms and a bathroom left to finish the interior of the house. 
Let me leave you with some words of advice, if you ever do decide to remodel a house, you need 2 things. Patience and a strong marriage. It is a JOB! #renoathousenumber6
  

The House (2007)
More current view (2016)
The entire house was covered in this mess they called carpet! The flooring is the best part of the remodel. I'm so glad this is gone in the majority of the house...only 2 more rooms to go. 


The Living Room Before
And After
Still a little plain (this was right after remodel)
My Daughter's Room remodel #1 (I failed to take "before" photos)
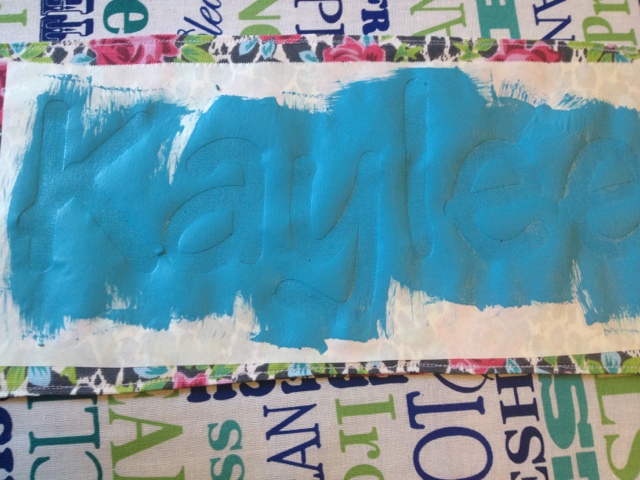
Daughter's room before take 2

Daughter's room #2 (The "big girl" room)
Hallway...we took paneling down and removed carpet. 


              Guest bathroom before 


I am in love with my new bathroom!!


                    Kitchen Remodel
                            Before
Countertops from Campbell's Countertops in Greer, SC
Old (top) vs. New(bottom) Cabinet finish
Paint choice

That tile was a pain (according to my husband) but well worth it. I love the look!

Our next project added some life to the outside. My husband built a swing set and fire pit. I adore this part of the yard!


You may have seen the idea on Pinterest. Overall we have about $1200-$1500 in the entire project but it's completely worth it!

Laundry Room
Before (for some reason I did not get a complete room shot)
After paint 
Flooring done!


All done except some trim! Do you have any idea how hard it is to go without your laundry room?
The start of the "master" bathroom. Seriously, my closet is 5x bigger than my bathroom. I'm so glad that green 1970 linoleum is gone! We gutted the bathroom except for the shower.
New subfloor 
The face behind the work. He's less than thrilled with my blog posts and picture taking!


Saturday, August 10, 2013

Picture Frame Weekly Menu

Everyday my husband and I have the same conversation..."what do you want for supper?". As with most couples, the response is normally "doesn't matter" or "I don't care". Reaching for my inner PINsperation, I created a dry erase weekly menu. We decide every Sunday our menu for the week as we are making out the grocery list. No matter who gets home first, we already know what to fix! 

Simply done, I used a collage frame from Walmart and created printables to match my Cafe Au Lait kitchen. 


Tuesday, July 23, 2013

Upcycled Director's Chair

Bear with me as this gets a bit lengthy...I was walking through our local Goodwill when I saw this wooden contraption lying on the floor. Sparking my curiosity, I went to see if I could tell what it was. Upon further investigation I saw it was the frame of a director's chair. A frame that looked as if it had been through a hurricane and someone had done a terrible attempt at trying to fix it up. It was priced at $3 so I snatched it up knowing I could give it a new life!

Here is the helpless, crumpled and folded chair as I found it. 


After leaving Goodwill, I ran to Hobby Lobby and found this cute duck fabric on clearance ($3/yd). 


And...these rosey knobs. 


A final stop at Walmart to pick up spray paint and a long dowel finished my supply needs. The chair's prior owner had tried to brush paint the frame...horrible mistake. Spray painting is so much easier!! I prefer to use Krylon Paint+Primer. It's a little more pricey but eliminates a lot of sanding and paint layers. And...since the chair did not have its' original seat, I had to buy the dowel in order to place the seat fabric. This will make more sense later. 

To start the upcycle, I took the chair apart and put the hinges and screws aside. I grabbed a block sander out of the building and gave the chair a quick buff and wash. 


When that was done, It was time to let the spray painting begin. I did 2 coats of paint allowing to dry 24 hours between each coat. Our South Carolina humid summer heat makes the paint take longer to dry. 

Here we are after paint session. 


I also painted the hinges. 


...Then reassembled the chair. That was the easy part. Now comes the measuring and sewing of the seat and back of the chair. First I measured the depth of the seat and cut the long dowel in  2 dowels that length. For my chair, it was 16" (this is also the depth for the seat fabric, I only added a 1/2" seam allowance for each side). Once the dowels were cut, I used them to measure how much fabric I would need to do the seat. 


The width of the seat measured 21". I added a 1/2" seam allowance to each side. My final dimensions were 17" deep x 22" wide. I marked my fabric and cut it. I place it right sides together and using a 1/2" seam I double stitched the front and back seams...leaving the sides open. I trimmed away the excess and turned the fabric right side out. Then pressed the seams. I learned the hard way not to under estimate the value of ironing when sewing. You should never skip that step! 


Once it was right side out and pressed, I put the dowels inside the fabric. 


Using my 1/2" seam allowance, I zig-zag stitched on top of the fabric to close up the sides and trimmed off the excess. I left the edges raw because you won't see them. Next I situated the dowels at the edge and was ready to assemble my seat. 


To assemble the seat, I folded the chair together and slid the dowels down the groove. Then I opened the chair back up and tada...a seat! 


Now..all ready to make the back. I used the same measuring techniques as with the seat. I measured width and height and added 1" to give a 1/2" seam allowance to each side. My dimemsions ended up being 7 1/2" high x 22" wide. I cut 2 pieces of fabric at this size. Then I folded up and pinned the 1/2" seam allowance on each top and bottom edge (long edges) of the fabric. 


Then I stitched it in place.  


Once all long edges on both pieces of fabric were stitched, I placed right sides together and double stitched the sides together using a 1/2" seam allowance. After that I turned the fabric right side out, pressed the seams. Then I went to measure. 


Using pins, I marked where I needed to stitch so that the fabric would slide right over the wooden posts. 


I pulled the fabric back off the chair and went inside to measure the distance between the edge of the fabric and the pins. For my chair it was 1 1/2". So I top stitched 1 1/2" from the edge to make a tube to slide over the posts. 


I was now ready to close up the long edges. I simply turned the fabric and top stitched the pieces together between each 1 1/2" seam I just made. Be careful not to stitch past that or you will close up your tubes. 


I did a quick fit test then proceeded. No director is complete without their name on the back. Therefore I pulled out my Cricut and freezer paper to make a stencil. (If you have thick fabric such as the duck, you can do this now. If you are using a thin fabric, do this step before stitching the back close as the paint may bleed through) You can also do this by hand using a print and trace method and cutting the stencil out with a utility knife. At any rate, once you have your stencil, you're ready to iron it in place. 

Make sure all edges are down completely. Next I chose some turquoise acrylic paint and applied it liberally around the edge of the letters then smoothed it using a sponge brush. The reason I used a lot of paint was to gain coverage without having to use a lot of pressure. I didn't want to have the paint come through the other side. 


Gave a quick blow dry...


...then peeled off the stencil once the paint was dry to touch. 


Last, I put the back on the chair. Drilled some holes for the knobs and placed them in the chair. 


From drab to fab!!! Couldn't be happier with the results! 


Follow Me on Pinterest